Establishing yourself as an online business or growing your current venture online can be a daunting task. However, with the right tools and the know how, you can get your online store up and running in no time. This guide will walk you through step by step how to get started. You can easily WooCommerce – in fact many web hosts will have a simple “1 click” install option. This can be found on cPanel too.
All you need is WordPress and you’re ready to go!
During your search for a suitable theme, you have probably encountered WooCommerce at some point. This is considered to be one of the best if not the best way to manage your online store. There are a variety of free and paid for themes on the WooCommerce website, many of which can be easily installed and customised from your WordPress dashboard.
The first step to install WooCommerce is to either choose one of their existing WooThemes or customise your existing WordPress theme with the ecommerce plug-in. For the purpose of this guide we will be using the Free WooTheme, AccessPress Lite.
From the main dashboard navigate to Appearance – Themes. Click ‘Add New’ This will bring you to the main themes page as below;
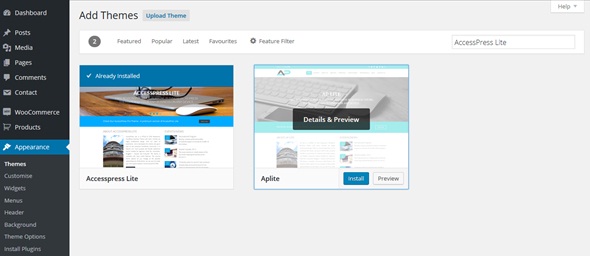
Select the AccessPress Lite theme and install
Once installed you can then begin to customise your online store and add products, widgets and integrate features such as a shopping cart. With the free theme you are quite limited in terms of changing the colour of the website; if you wish to do this, you will need to purchase the pro version.
To begin building your store, you will need to navigate to the WooCommerce option on the left menu.
The WooCommerce option on the menu provides a number of different functions where you can manage all aspects of your online store, from creating products through to setting up coupon codes, defining your settings and integrating payment gateways.
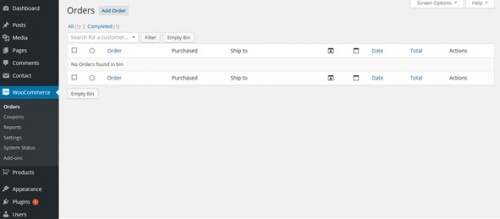
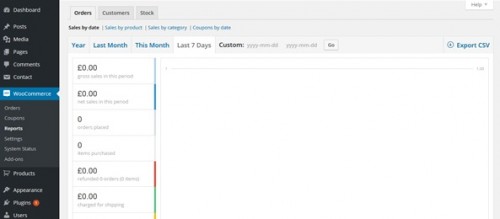
The first section in the WooCommerce category relates to your orders and this is really useful when you have your shop up and running. In particular, this section will display any orders that you have received through the website, providing you with an overview of each order including;
Order Automatically generated customer order number and their name will be displayed in this field
Purchased – The number of items
Ship to – Delivery address
Customer Message – Whether the customer has left you any specific instructions
Order Notes – Whether there are any specific notes to accompany the order
Date – Order date
Total – How much and payment method
Coupons
If you would like to run promotional periods and provide customers with discounts this is where you add them on this screen.
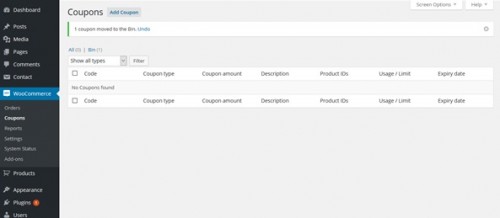
Adding coupons is really simple and achieved in just a couple of steps.
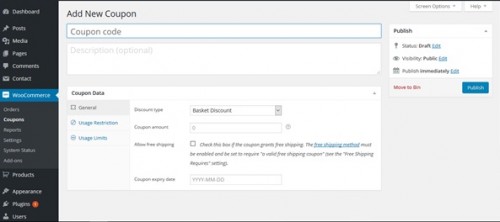
To add a new coupon click ‘Add Coupon’, this will display the following screen. From this screen you can create a coupon code, add a description and provide instructions for when it should be applied. Once you are happy with all of the details click ‘Publish’ and your code will be active.
Reports
The reports tab provides you with an insight into customer behaviour and which products are proving popular on your website. This is really helpful if you have an extensive catalogue of products and you are looking to streamline your online store. Poorly performing products can be removed and/or new ones can be added. The reports section can also help you determine who your customers are and their purchase habits as well as determining any patterns in stock or identifying products which are popular.
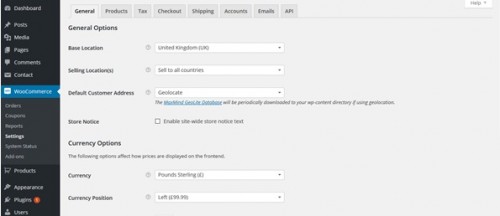
Settings
Within the settings menu you can control a number of items in your store.
Once you have familiarised yourself with the main categories under WooCommerce, you need to start building your store which you can do in the ‘Products’ option on the menu. When you click on Products this will take you to a screen and will display a list of current products that you have on your website.
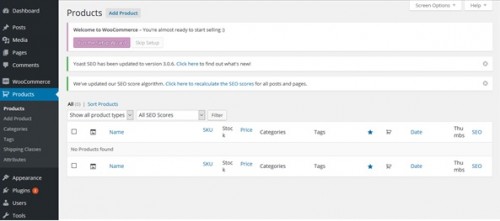
As we are building our store from scratch there are no products currently listed in the online store so we will need to start the process of adding products;
The first half of the product page is very similar in nature to a blog post or new page. Instead of the page or post title, you will need to assign a name to each product. In the large text box you can add in a description of the product which will be displayed on each product page.

Setting up SEO
It is really important that you optimise each of your product pages for SEO. If you are not sure how to optimise your pages for SEO, there are lots of online guides to help or you can commission an agency or individual who specialise in SEO content writing to help you.
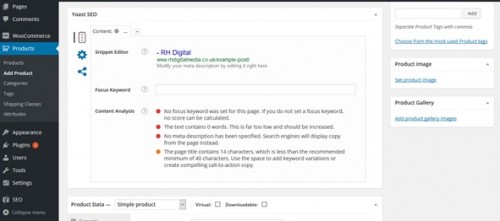
On the right of the screen you will also notice some categories that you can assign to each of your products along with the product image and gallery if you have multiple images.
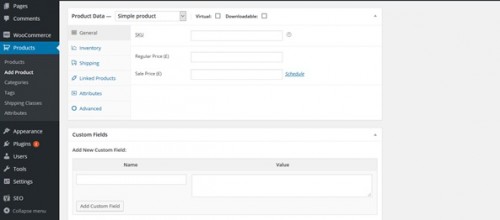
Product Information
The product page is quite complicated on first glance but once you have added the first few products, you will find that it is quite straightforward. Within the ‘Add Product’ section you can assign codes to each item, define shipping instructions, link other products and allocate pricing for each item.
Description
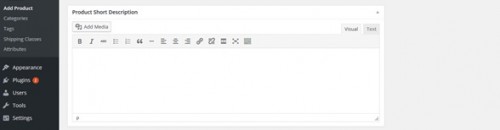
The final section of the product page enables you to provide a short description which will be listed on the page next to the product picture.
Once you are happy with the content for each description, have optimised the page and allocated the required product image(s) click ‘Publish’ to add the product to your online store.
WooCommerce is a relatively easy plug-in to use, provided that you set it up correctly and ensure that your product descriptions are accurate and compelling. Building your online store takes time but investing resources in creating the content for each description will increase conversions and build customer confidence.