The web has gotten increasingly visual. There seems to be a more universal appeal to beautiful and captivating imagery over blocks of text. Even supposedly text-heavy sites like news websites and digital magazines are now packed with large feature images and thumbnails.

Feature Image Source: Pixabay
Unfortunately, images are expensive, in terms of bandwidth and even production. Image files are typically larger than text content. This means these take up more hosting space and bandwidth, and will also take more time to load on a web page.
What makes things more complicated is how speed has become central to user experience (UX) especially with an increased focus on mobile devices today. Users will only wait for a few seconds before abandoning a slow-moving mobile website.
So, users essentially want visual content and speedy page loads. To achieve this, you need to apply image optimization.
The key is being able to speed things up without sacrificing image quality.
In this post, we will go over some important concepts that would help you apply essential optimization to your website’s images, in order to improve page load speed. We will also discuss some network-layer tweaks, such as deploying a content delivery network (CDN) to speed up image delivery and reduce lag times.
Choose the right image file format
Let’s just jump to the most common image file types used in today’s web, their features, and the situations for which they are best used.
What’s important to understand is that the different file formats offer different compression methods. Lossless compression retains all the original image data. Lossy compression removes “negligible” image data resulting in smaller file sizes. However, you can’t recover the data that was removed, and this may result in distortion or pixelation if used aggressively.
Here are the most common file types used for web:
- JPEG – Lossy file compression. Supports 24-bit color (16M+ colors). Best used for detailed images such as photographs. Can achieve good detail-to-filesize ratio.
- GIF – Lossless file compression. Supports 8-bit color (256 colors). Used for animation such product diagrams and UX demonstrations as alternative to video.
- PNG-8 – Lossless file compression. Supports 8-bit color and transparency. Used for simple line, text, and shape images such as logos and web page design elements.
- PNG-24 – Lossless file compression. Supports 24-bit color and transparency. Used for more detailed images that requires transparency.
Optimize your images with an editor
Adobe Cloud software remains to be the gold standard in image editing and manipulation, but these tips should work even on the free ones.
Resize according to how the images will be viewed
Some people think that, because of broadband internet, they can get away with using the largest and best quality images they have available. Say, a full-quality JPEG from a 12-megapixel camera is around 3 to 4 MB. Sure these would look stunning but the pixel dimensions would be at around 4,272 x 2,848 px.
You could use it for those stunning full-width images on your site, but even on full-HD screens, the image will still be resized to the browser’s full screen width of about 1,080 px. That’s wasted size and wasted space. It’s a good thing that a CMS like WordPress already generates smaller sizes upon upload for use in responsive pages.
If your maximum screen size is full-HD screens, you should resize your largest version of the image to just the maximum the screen can display at 100 percent. In this, case 12-megapixel JPEG resized to 1080p width at maximum quality should be less than just 1 MB versus the original 3 to 4 MB.
Reduce JPG quality
When saving JPEG files, you have the option to set the quality or how lossy the compression will be. To save time, some people don’t bother fiddling with these settings, even if the file size differences can be huge.
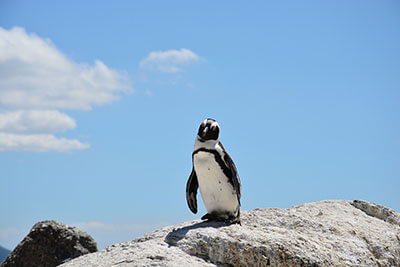
In the images below, you may struggle to find differences between the images at 100% vs. 80% quality and 80% vs. 60% quality when viewing the 400 x 267 px at 100% scale on your browser. In the 10% quality image, we can see pixelation and loss of detail happen.
But take a look at the file size differences. The 60% quality image is less than a third of the 100% quality image! Find the “sweet spot” wherein you can lower a JPEG’s quality and maintain an acceptable quality to save on file size.
100% Quality – 63 KB

80% Quality – 29KB

60% Quality – 18KB

10% Quality – 7KB

Sample Image Source: Pixabay
Choose between JPEG and PNG
Depending on the image that you are displaying, you can experiment. For detailed images like photographs, JPEG usually holds a key advantage over PNG-24 in terms of file size. However, for more simple images like text, line art, and logos of flat and limited colors, PNG can have the advantage. PNG also supports transparency, which is great in cases where you want the page’s background to show behind the image.
JPG – 100% Quality – 37 KB

JPG – 10% Quality – 6.25 KB

PNG-24 – 4.36 KB

PNG-8 – 3.29 KB

GIF – 3.76 KB

Even at a very low setting, the JPEG image can’t match the quality and files size of PNG and GIF in such an image. One can make a case for GIF in this case since it also uses transparency and is a lossless format, but PNG-8 gave a smaller file (even if it’s just a few bytes) with no noticeable difference in quality.
All these bytes eventually add up!
Use image optimizers
The advantage of using powerful tools like Adobe Photoshop is that the tool also has some pretty powerful features to compress images such as “Export As” or “Save for Web”. These features allow you to set quality, size, and advanced format settings to help you get the best file size given a particular file format. But these do come with a price.
If you are using free image editors, you can use a third-party service to further compress the image promising the same quality but with some byte savings. Among the popular image compression services are TinyPNG, Compressor.io, and Optimizilla.
Here’s an example of our already-compressed JPEG imaged. The images look about the same but the “optimized” file saved more than 1 KB.
JPEG – 60% Quality – 17.6 KB

JPEG – Optimized – 16.0 KB
Use a CDN
There’s only so much you can do to make the images’ file sizes smaller. One thing you can do would be to improve the infrastructure that serves your website. Using a CDN is among the top recommended steps to improve website performance in general.
CDNs basically creates cached copies of your website’s resources (including images) and distributes them in servers across the world. When a user visits your site, they now fetch those resources from the CDN’s node which is nearest them. Bandwidth-heavy resources like images would not have to be fetched from your web server over and over, but from the CDN’s server. This reduces lag and improves page response time.
A CDN services like Incapsula will go beyond caching when it comes to images. The service comes with the option to automate image compression by letting you choose between loading speed and image quality. More advanced features include progressive rendering, wherein the CDN will shows images that progressively display improving or higher-resolution versions of the image until the best quality image is loaded. This provides a better user experience by shortening the visitor’s perceived load time. It is quite usefully when trying to show full-resolution images, but don’t want to sacrifice on load speeds.
Progressive Rendering – Start
Progressive Rendering – Middle
Progressive Rendering – End

Every byte counts
Speed is truly essential in today’s web design and development. Slow-loading websites, especially for mobile might soon be penalized by Google and Facebook. Rather than risk losing more visitors, it pays to do some of these tweaks and optimization so that your site delivers a superior browsing experience to your users. Remember, every byte counts. Small savings will add up. Optimizing your images enables you to strike that balance of visual appeal and performance.